~ "By wisdom a house is built, and through understanding it is established; Through knowledge its rooms are filled with rare and beautiful treasures." ~ "Reckless words pierce like a sword, but the tongue of the wise brings healing" ~ "But the wisdom that is from above is first pure, then peaceable, gentle, and easy to be intreated, full of mercy and good fruits, without partiality, and without hypocrisy." ~ "Trust in the LORD with all your heart, and lean not on your own understanding; in all your ways acknowledge Him, and He shall direct your paths."~
Showing posts with label Ice cream. Show all posts

Thursday, September 10, 2015

The Best and Easiest No Churn Ice Cream/Gelato... an Espresso Gelato Variation.

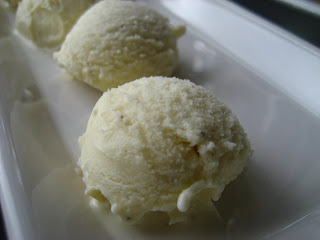
Espresso Ice Cream/Gelato Variation... No Churn, One Bowl, 4 Ingredients. Since I mentioned in my last post the amazing ice cream I've been making this summer ... I knew I couldn't let it go without sharing it with you as well. I know it's kind of late, why with summer being almost over... but ice cream, well, ice scream can be made all year round:).

If you've always wanted to make ice scream at home and had no ice scream  maker... well, this recipe is for you. 
If you've always wanted to make homemade ice scream that was smooth, creamy and without ice crystals... then this recipe is for you. 
If you've always wanted to make a ton of ice scream variations without so many recipe variations... well, this ice cream is for you. 
If you enjoy the store-bought Tallenti gelato... well, this homemade version is it! Actually, my husband says it's way better. 

Ok, so  I hardly ever call a recipe AMAZING... because recipes are quite subjective. What I may call amazing, you may not... and while others may call a recipe amazing, I may not. But... this ice scream recipe is truly outstanding. And it's super, super simple to make! It will amaze you and amaze your guests as well.  Well, at least those of us that like ice scream:)...

I've made this ice cream(more like gelato) many times... it's foolproof! I've played around with the flavor variations, and they've all been delicious. And while I've posted exact measurements for best results, I've also used a can of sweetened condensed milk  combined with 1 (475ml=2 cups) heavy cream container... to make a double batch. This way you don't need to buy a second container of heavy cream:). It's a tad sweeter, but not noticeably. 

While you can find variations to the no churn ice cream online, I find this is by far the easiest to do. You place all the ingredients in a bowl and whip to soft peaks... this of course doesn't include any add-ins you may choose to include, which you' ll fold in at the end. The only thing you have to remember is to not over beat the cream... otherwise it will turn buttery. Beat it to the consistency of a light mayonnaise and you'll be ok.. And all this is done in a single bowl... no need to beat the cream separately.

I hope you enjoy this recipe as much as I do... I know my husband enjoys it the most:).  This would be lovely... placed in disposable containers with a pretty label... perfect to bring as a hostess gift. Hope you enjoy...

Note: You can make this ice cream/gelato with with a ton of variations... the idea is to use heavy cream, sweetened condensed milk and flavorings of choice. 

The alcohol can be optional, though it keeps the ice scream from freezing solid in the freezer.

Variations I have made in the past included ingredients I had on hand at the moment:

 1)A mint chocolate chip, adding mint extract, and mini chips along with 1 TBS cherry liqueur, 
2) A chocolate rum-walnut, adding 1-2 TBS dark cocoa, rum extract and chopped walnuts along with 1 TBS cherry liqueur, 
3) A cherry shaved chocolate(cherry garcia), adding just the cherries from  fruit-sweetened cherry preserves, almond extract, and shavings of dark chocolate along with 1 TBS cherry liqueur.

But variations can be endless... adding broken up cookies, brownies, cookie dough, various cooked down fruits, nuts and chocolate can all be used. Be creative and make your own... apple pie, pumpkin pie and cherry pie sound wonderful:)...

Ingredients: Adapted from Nigella Lawson - makes about 1 1/2 pints (or 800 ml) 

1 ¼ cups cold heavy cream
⅔ cup sweetened condensed milk
2 tablespoons instant espresso powder
2 tablespoons Irish Cream (or you can use espresso liqueur)

Directions:

1. Measure and place all ingredients in a large bowl.

2. Using a hand held mixer(or you can whisk by hand) beat ingredients  until soft peaks form, and has thickened into an airy mixture, almost similar to a light mayonnaise consistency. Do not overbeat.
3. Pour in a freezer proof air tight container, and freeze overnight.
4. Enjoy a scoop of delicious and super smooth ice cream:)!

Tuesday, July 23, 2013

Toasted Nut Chocolate Covered Ice Cream Bombes.

Toasted Nut Chocolate Covered Ice Cream Balls (Bombes).  Sometimes I like to do something fun in the kitchen. Like making these ice cream "bombs". Bombs, because they sort of look like grenades:)... or bombes, because it's a more sophisticated culinary term:). In any case, these are not just fun to make, but equally fun to eat... and they taste a thousand times better than they look. They're a definite treat!  

When I first started blogging, I posted a similar recipe(you can see it here) and called them bon bons... they were smaller and simple. Just chocolate and vanilla ice cream. This time around I upgraded them a bit by making them bigger and adding some toasted almonds... resulting in ice cream "bombs". They're actually a bit bigger than golf balls. 

The addition of toasted almonds(or other nut of choice) brings in extra flavor... as well another element of crunch besides the chocolate coating. In reality, I added the nuts to make the dipping more manageable. The toasted nut coating protects the ice cream from melting as you dip. It also allows you to roll the ice cream into balls and gives the chocolate something to "grab" on to... without making a total mess. It's quite frustrating to have the chocolate slip off the ice cream as you dip...

The only difficult part with this recipe is trying to keep the ice cream balls frozen while working with them... which means all the time. This requires making the dessert in stages. It's sort of like making multi colored jello, where each layer needs to be solid before adding another subsequent layer. The same goes for this dessert. Ice cream gets scooped unto a plate and frozen solid before being rolled into nuts and frozen again... and only then is it dipped into cooled melted chocolate. Cooled chocolate is key... keeps the ice cream from melting.  And even though there's some waiting involved, it's totally worth it in the end. 

Once made, they can be kept in the freezer for quite some time... so you can make them ahead for special summer gatherings. The final product is a great summer treat that's sure to please old and young alike. Hope you enjoy...              

Tip: When working with the ice cream, it is important to work quickly in all stages... be it when forming them, rolling them in nuts, or dipping them in chocolate.  If you are planning on making quite a few pieces,  work in small batches(3 or 4 at a time) ... and place them in the freezer immediately. 
When dipping in chocolate, you will need to work quickly as the chocolate sets pretty fast.

Note: While I used toasted almonds, you can use any nut of choice... toasted is ideal for extra flavor and crunch. You can also use sugared flavored nuts for something different. For a few them, I used some butter-sugared toasted pecans with a hint cinnamon that I made .... yummy, with a different flavor! I'm thinking if you have a nut allergy you can substitute the nuts with toasted coconut... or even some rice crispies. Other crunchy ideas you may have will also probably work:).

You will need: can make one or as many as you need... I eyeballed the amounts and at one point needed to melt additional chocolate:)

vanilla ice cream(you can use ice cream of choice)
melted chocolate
toasted nuts

Directions:

1. Line a plate with plastic wrap. Place in freezer till cold.
2. Using a 1.5 TBS ice scream scoop, scoop out ice cream and place on cold plate. Place in freezer till ice cream is hard. I left mine overnight.
3. Toast nuts and chop finely. I used my toaster oven at 350 F for about 10 minutes or so... or until lightly toasted. 
4. Remove ice scream scoops from freezer and roll in nuts... making sure to completely cover with nuts. When covered in nuts, quickly form them in round balls using your hands. Do only a few at a time so they don't melt. Place in freezer to harden as you finish two or three... I left them for half a day or so in the freezer to harden. 
5. Melt chocolate in a double boiler. Remove from heat and allow chocolate to cool down, about 85 degF or so... I left mine for about 20-30 minutes at room temp, but it was a warm day. You still want the chocolate to flow, but not be hot to the touch.  
6. Line a plate with plastic wrap.
7. Remove nut covered ice cream balls from freezer(you may do a few at at time) and dip in chocolate... you will need to work quickly as the chocolate will set fast. Place dipped ice cream bombes on plastic line plate and place in freezer. If you want, you can sprinkle some toasted nuts on top... when chocolate is still wet. You can also drizzle extra chocolate on top in thin lines for a textured effect. Continue with rest until all are finished. 


Thursday, September 29, 2011

Raw Cashew Ice Cream...Dairy and Egg-Free


Raw Cashew "Ice Cream"...and a Chocolate Version. If you can believe it, we have been having some really warm weather. After having our first official frost a week or so ago, the weather suddenly turned warm... and even hit 90 degs. F! So, of course it was time for ice cream:).
This is a simple "ice cream" to make... dairy and egg-free. I know, I know, you wouldn't think that it would be possible to make ice cream without the dairy... but this "ice cream" was really delicious! Have you ever tried this version of cashew "ice cream" before? Well, it's slowly become pretty popular to use cashews as a base for quite a few recipes... especially as a substitute for dairy. Raw cashews are used to make cashew "butter", cashew "milk", cashew "cream", cashew "cheese"... and even cashew "ice cream".
Because the raw cashew nuts don't really have much flavor in themselves, and because they are quite fatty, they lend themselves to being used as a substitute for cream or even butter. You can actually use the cashew cream for many savory sauces... especially great in Indian dishes. And ever since I came across the idea of using raw cashews in a variety of dishes, I've wanted to try using them in at least one recipe. I thought I would give the cashew ice cream a go... as I really wouldn't mind having a good healthy recipe for cashew ice cream.
This is one ice cream, I'll be making again. My husband LOVED this chocolate version... said it reminded him somewhat of Nutella. I can see how...nuts and cacao are sort of similar to the Nutella ingredients. Well, sort of.
This cashew ice cream can get to be a bit more expensive than normal ice cream...raw cashews aren't exactly inexpensive... but it does offer a healthy alternative to regular ice cream. And if you are lactose intolerant, this might be a great substitution. You can soak the cashews overnight to maximize the nutrition, but you can also make it un-soaked. While I like the plain version, I MUCH preferred the chocolate:). I am now thinking of making an almond version. Hope you enjoy...

Note: If you’re not using a high-speed blender( I use a Vita-Mix) you may want to strain the cashew milk(cashews and water) before adding the sweetener and other ingredients....though I don't think it is necessary, unless you want a very smooth ice cream.

You will need: initially inspired by The Purple Carrot

Cashew Ice Cream Base:
1 1/2 cups raw cashews, soaked or not*
2 cups water
1/2-3/4 cup maple syrup**
1-2 TBS honey**
pinch of salt, the salt actually brings all the flavors together
2 tsps vanilla
* You can soak the nuts in water for a minimum of 4 hours or over-night.
* *you could use any sweetener of choice here...to taste...I'm thinking even dates will work.

Add-ins: Chocolate Version
2 TBS dark cacao
2-3 TBS shredded unsweetened coconut
1/3 cup chopped roasted peanuts, or other nuts
1/3 cup chopped chocolate, or use mini chocolate chips
1/4 cup chopped dried cherries, or other fruits, optional
1 TBS chambord, optional

Directions:
Making the cashew ice cream base:
1. Blend everything in a blender until smooth.....you can first blend the cashews and water... and then add the rest of the ingredients, tasting and adjusting for sweetness.
2. Pour cashew mixture in an ice cream maker and churn according to manufacturer's instructions.
3. Freeze for a couple of hours before serving for best results.
~Freezing for overnight will make the ice cream hard and texture a bit more icy....it's still good, but different.~

Making the Chocolate Version:
1. Add the add-ins the last 5 minutes of churning....making sure everything is mixed in. I chose to add the cacao with the other add-ins. But you can add the cacao to the ice cream base first, if you like.
~ If you simply want a chocolate version without the add-ins, opt to add the cacao with the cashew ice cream base...blend till smooth and pour in ice cream maker.~

Friday, September 9, 2011

One Ingredient Banana "Ice Cream"...

One Ingredient Banana "Ice Cream"... I'd better post this recipe before summer is gone:). I've made this particular "ice cream" many times...for myself mostly... on the days I want something healthy and yet still feel like I am eating "ice cream". I'll be honest, this is not my husband's favorite.... he'll have regular ice cream, while I enjoy this banana "ice cream":).
The ice cream, as is, tends to have a slight bitter aftertaste...not much, but it's there. I don't know why it is... I 've made plenty of batches, thinking it might be the bananas...but I think they get a bit bitter in the freezing process(not exactly positive)... but maybe it's also because I don't use overly ripe bananas. I'm thinking that using a bit more ripe bananas could help with the slight bitter aftertaste, but then the "ice cream" will be a bit darker in color as well, and I prefer mine creamy white... or as white as possible:). In any case, I do overlook the slight bitterness and still enjoy the "ice cream" immensely:). If you add chocolate and other ingredients...and then sweeten it up a bit:), the very slight bitter taste can actually disappear.
But what I do like about the banana ice cream, is that is incredibly creamy... and it actually feels like you're eating ice cream. Seriously. On the plus side, there's not that many calories involved...and it's actually quite good for you:). The ice cream is best served immediately... after it has been processed. I noticed that if you freeze it for later, the ice cream will harden, get a bit icy, and not be as creamy.
I'm well aware that this recipe may not be something new...and that many of you have come across it quite some time ago... as it is quite popular. I've mentioned it before, but in case you've never come across this recipe... I thought to share it. Especially great as an after school snack.... healthier alternative for the kids without the sugar high:). Hope you enjoy...

Tip: I think the secret to getting a creamy end product is to keep scraping the bananas off the sides and bottom of the food processor as you process it...stopping and scraping until it becomes creamy. It does take a few minutes.
I only use a food processor to make the "ice cream"... never tried a blender.
Feel free to add other ingredients to the base...shaved chocolate, cherries, crushed cookies, nuts, honey, nutella, peanut butter, almond butter, etc....or drizzle any syrup of choice. It will no longer be a one ingredient ice cream... but still good:)
The banana "ice cream" melts rather quickly...so serve immediately.

You will need: initially inspired by the kitchn

4 bananas

Directions:
1. Peel and cut bananas in 1 inch slices.
2. Place the banana slices on a parchment lined/plastic wrap plate in a single layer.
3. Freeze banana slices for 2-3 hours or until firmly frozen(this all depends on your freezer). Don't freeze overnight.
4. Place the frozen banana slices in a food processor and process until bananas form a smooth paste and looks like soft serve ice scream. This can take a few minutes. Stop and scrape the bananas every so often.
5. Serve immediately.

Wednesday, July 13, 2011

Fresh Strawberry Gelato...Egg-free


Strawberry Gelato...Egg-free. Because of all the rain we've been having this year, my strawberry patch has done quite well. And even though my strawberries ripened later than normal, I was thrilled to finally harvest a couple of bowlfuls this past week. I was really surprised to get so much, as the previous years weren't so bountiful. Granted the strawberries have multiplied and have practically taken over my garden:). I always seem to struggle with the thought of cooking any garden-fresh fruit or vegetable if I don't have to.


We love to eat the strawberries and savor the taste without adding or taking away from their natural goodness. But I really wanted to make something special with a few of them...I figured I had some to spare. I thought about making a fresh berry tart, or a cheesecake, or a sweet bread...but I finally decided to make a gelato. I had come across a rather intriguing recipe that used no eggs and I really wanted to try it. The recipe used cornstarch to thicken the gelato base, and I was really curious how that would play out in the final recipe. Would it make it creamy?...
I really wanted the gelato to be creamy and definitely not icy. I've made plenty of ice creams that do not use an egg custard base...and most of them come out icy. This was different...creamy and oh-so delicious! LOVED it!
The only issue I have with this recipe, is that it doesn't make enough:)...had to make another batch (using cherries instead and some shaved chocolate). I am thinking this recipe can be made with other types of fruits...definitely worth trying, as I loved how creamy and easy this was to make. Hope you enjoy...

Note: While this recipe uses cornstarch as a thickener, I am thinking it can probably be replaced with another form of thickener..maybe tapioca starch, or arrowroot. Not sure though...as I haven't yet tried either of them. I did read that arrowroot when mixed with dairy products, can cause it to get slimy. Now, I don't know how that would turn out when frozen... But if you do try it, I would love to know how that works in this recipe... or if you've used a different thickener.

You will need: adapted from Bon Appetit via Epicurious

3/4 cup sugar
1 TBS cornstarch
1 cup whole milk
3/4 cup heavy whipping cream
2 1/4 cups sliced strawberries
2 TBS pomegranate juice, optional
1-2 TBS Chambord*
* you can use a bit of vanilla instead

Directions:
1. Wash, hull, and slice strawberries. Puree sliced strawberries in a food processor. Strain (I didn't bother, as I like the seeds...and honestly did not wan't to lose any part of my strawberries:))... and set aside.
2. To a medium sauce pan, add sugar and cornstarch. Stir to combine.
3. Add milk and cream. Whisk to combine.
4. Whisk gelato mixture over medium heat until it thickens and starts to bubble....about 5 minutes.
5. Cool gelato base over an ice bath and add pureed strawberries...and Chambord, pomegranate juice or vanilla, if using.
6. Chill 3 hours or overnight( I left mine for 24 hours in the fridge).
7. Process in ice cream maker....you can always add some shaved/chopped chocolate towards the end of the churning process.
8. Freeze for at least 3 hours before serving.

Wednesday, February 9, 2011

Phyllo Dough " Cannoli "...filled with Vanilla Ice Cream


Phyllo Dough " Cannoli "... filled with Vanilla Ice Cream. I came up with this dessert one night after seeing an Australian chef make a strawberry cream-filled "cannoli". He ended up using a tuile cookie to form the "cannoli", but I loved the idea and instantly thought of using phyllo dough. It would be unique and different...plus, I had some on hand. At the time I really didn't know if it would work. But I really wanted to give it a try. If it would work, I'd be thrilled...if not,well... I'd just have some crispy phyllo:). Funny how at the moment you think that you've invented something new... to later find out that it's been done before:). Anyway, at least it was new for me:)...
Since vanilla ice cream is one of my husband's favorites, I ended up using it to fill the "cannoli" shells. Next time, I would like to fill it with different fillings...maybe some chocolate mousse or pastry cream. The phyllo shell isn't very difficult to make. You just need a very light hand when removing them from the cannoli tubes and when filling them. Other than that, they're pretty much straightforward. You can fill the shells with whatever filling you like and decorate as desired. The shells can be made in advance and you can make as many shells as you need...just fill them the following day(or even the same day). If filling them with ice cream, they stay frozen and crispy for days. Love this type of dessert that can be made ahead.
The result was wonderful and I am glad it worked! It is a nice alternative to the traditional fried cannoli that's filled with sweetened orange-scented ricotta. Sure it isn't the same...and maybe I shouldn't even call it a "cannoli". But since it was inspired by the cannoli, I can only give it credit:). It's still a rather nice dessert, regardless of the name....and it was a sweet surprise for my husband. He loved it. Hope you enjoy...

You will need:

phyllo dough sheets (mine are 13x9 inches)
melted butter
cannoli molds*
* I think you can make the molds out of aluminum foil...or for better stability, you can make a tube out of cardboard and then wrap it in aluminum paper, making sure the aluminum paper is quite smooth...like I made my bread cones, except make the paper forms tube-like.

Filling of choice: just some ideas
ice cream
mousse
cannoli filling
pudding
custards

Decorate with: just ideas
melted chocolate
chopped pistachios or other nuts
berry sauce
chocolate sauce
caramel sauce
powdered sugar

Directions:
1. Preheat oven to 375 deg.
2. Butter/oil cannoli forms.
3. Brush a 13x9 phyllo sheet with melted butter...fold in half and brush with melted butter...fold in half again to give you a strip and brush with melted butter.
4. Place buttered cannoli form on one end and roll up.
5. Place forms(seam side down) onto a parchment paper/silpat and bake in preheated oven for about 7-10 minutes or until golden brown...do keep an eye on it, so as not to burn.
6. Let forms cool a bit. Use oven mits to hold the cannoli forms and remove phyllo forms GENTLY....use a light hand, as the phyllo can break on you. If need be, twist gently as you pull the steel forms keeping your fingers in the ends(not the middle part).
7. Cool completely.
8. Decorate as desired...and let set completely.
9. Scoop some ice cream into a piping bag, making sure the ice cream isn't soft. Twist the end of the piping bag and squeeze the bag a bit to warm the ice cream enough to pipe through the cannoli forms.
10. Pipe ice cream in cannoli forms(being very gentle with the phyllo)...from both ends. Immediately place in freezer.

The ice cream-filled "cannoli" can be frozen ...place them in a container with lid and place some parchment paper in between the layers.

Thursday, November 18, 2010

Pumpkin Ice Cream


Pumpkin Ice Cream... I love my ice cream maker. That's because I get to make ice cream that's homemade and delicious. I know it is much, much easier just to go buy a container. No mess at home, no recipe gone wrong, no work. But, sometimes it's worth making your own... just because you can be creative.... and well... the homemade taste just can't be beat. I think it's well worth the effort.
When making your own ice cream, you have the ability to add all sorts of flavorings and add-ins ... to make it just the way you like it. And, I think that's pretty neat...because oftentimes when making your own flavor, you will most likely not find it on the market. It's fresh, it's unique, and it's your very own concoction:). Usually, that's what's really fun about making your own ice cream ...like this creamy version of pumpkin ice cream. Perfect for fall....and perfect for using some of your leftover pumpkin puree:).
I've never tried pumpkin ice cream before, but I've wanted to make it for some time now...ever since I've seen so many versions of it... on different food blogs, as well as on other sites. I wasn't exactly sure how it would taste, but was hoping it would taste sort of like a mousse version of a pumpkin pie... if that is possible:). So I decided to use the Williams-Sonoma version as a base...and then changing a few things to come up with my own version. Please feel free to make the original...
For mine, I thought I could get away with making it with just using ingredients I had available at home. I used less egg yolks and a mixture of cream and half and half....that's because I didn't have enough cream. I omitted the bourbon because I didn't have any, but added a bit of rum extract to the vanilla. This is a custard style ice cream, so it comes out very creamy. You can enjoy it plain, with some nuts, or with various toppings. You can even sandwich some ice cream between 2 snickerdoodle or sugar cookies....or any other cookie for that matter. If you like, chocolate, you can use a chocolate cake instead of the cookies...which is what I ended up doing. Just the right kind of ice cream for this time of year. Loved the flavor and spice....and so creamy. Hope you enjoy...

You will need: inspired by Williams-Sonoma
1 cup pumpkin puree
1 tsp vanilla( or any flavoring you like, such as rum )
1 1/2 cups cream
1/2 half-half
3/4 cup packed brown sugar
4 egg yolks
1/2 tsp ground ginger*
1/2 tsp cinnamon*
pinch of nutmeg*
1/4 tsp salt
* I quite enjoyed the amount of spice the recipe contains, bit if you feel you don't care for too much of the spice, you can always adjust according to your preference.

Directions:
In a bowl, mix together the vanilla( or flavoring of choice~ if using bourbon, you will want to add it in the last couple of minutes of churning) and pumpkin puree. Place in fridge while you make the ice cream custard. In a saucepan, combine 1 cup cream plus 1/2 cup half-half. Add 1/2 cup brown sugar and mix to combine. Over med. heat, cook mixture till bubbles form on the outside of the pan... approx. 5 minutes. Be careful not to overcook as the cream can curdle.
Meanwhile, in a separate bowl, combine 1/2 cup cream, egg yolks, 1/4 cup brown sugar, cinnamon, ginger , nutmeg and salt. Whisk until smooth and sugar begins to dissolve. Gradually whisk in about 1/2 cup of the hot cream mixture into the egg mixture until smooth. Pour the egg mixture into the pan and cook on med heat until mixture coats the back of a wooden spoon (oops... I used a non-wooden spoon). the mixture should slightly thicken...it should take about 4-6 minutes. DO NOT LET IT BOIL. Strain custard through a fine mesh sieve( I didn't bother).
Place the bowl over an ice bath and stir to cool mixture. Take out pumpkin mixture from the fridge and whisk it in. Place a piece of plastic wrap directly over custard so as not to form a skin.
Refrigerate overnight. Transfer custard to an ice cream machine and freeze according to manufacturer directions.
Remove ice cream and place in a freezer safe container and enjoy!


Friday, October 23, 2009

Easy All-Purpose Chocolate Cake...Perfect for Ice Cream Sandwiches


Easy All-Purpose Chocolate Cake...Perfect for Ice Cream Sandwiches. Some time ago, I stumbled upon the FineDinings website. Some of you may have noticed that I have it on my helpful links....some of you may have not noticed it at all:) I enjoy the site and have enjoyed making a couple of her recipes....there's a picture with every recipe, so that is always helpful. It takes a bit to manuever yourself through the site, dodging all the ads...but, there are some wonderful recipes. What I really like about the site, is that you can make some elegant restaurant dishes right in your own home. There are tips on how to make things ahead of time so that the meal can come together without so much stress. I was amazed with the author's creativity and most of all her story. You can read more information about how she started her website here...you will be absolutely amazed! This chocolate cake recipe is from her site and I will soon post another recipe that uses this same cake to make something marvelous! But for now, I will post the chocolate cake....which I used to make ice cream sandwiches! By the way, the chocolate cake is more like a devil's food cake ... soft, delicious, and not too sweet.
Some time ago, I made Giada's Hazelnut Gelato. Now, I like Giada's recipes, but this time around, I was a bit disappointed. Don't get me wrong...it was edible and all. Actually, some really liked it! Maybe it was just me...but, I wasn't crazy about it. It was smooth... with a faint hazelnut chocolate taste. It had more of a "hot chocolate" taste.... I thought the gelato was a bit more sugary and not as creamy as I would have liked it. Anyway, I still had quite a lot of the gelato in my freezer, and I wanted to use it up. So, I made this chocolate cake and "hid" my gelato between the cake, making ice cream sandwiches. It worked...and my gelato was transformed! But, feel free to use store bought ice cream to make this simple dessert. I am sure kids(and adults) will love it...

Cake: adapted from FineDinings.com
1 cup sugar
1 cup all purpose flour
3/4 tsp baking soda
2 TBS cocoa (I used extra dark)
1/4 cup butter
1/4 cup oil
1/2 cup water
1 egg
1/4 cup buttermilk (I used 2% milk with about 3 tsps lemon juice)
1/2 tsp vanilla (I used a bit more... close to 1 1/2tsp)
~you can also add 2 tsps of instant coffee
Directions:
Preheat oven to 350 deg. Line a 11 1/2 x 17 inch(or 10 x 15)baking sheet pan with parchment paper. Lightly grease the parchment paper. The original recipe uses a 10x15 pan(the cake would be a bit thicker) and calls for un-greased pan.... I was glad I used a parchment paper. I found out that it would have been a mess trying to take out the cake if it had not been lined. I also halved the recipe another day and used my toaster oven baking sheet(10 x 8 1/2). It worked great!

In a large mixing bowl combine the dry ingredients, sugar, flour,baking soda and cocoa.

In a sauce pan, add butter, oil, and water. Bring to boil. Add it to the dry ingredients.
Add the egg, buttermilk and vanilla.
Blend thoroughly.
Pour batter in parchment lined baking sheet. You may have to spread it out evenly.
(This was my toaster oven baking sheet)
Bake for about 10 minutes or until toothpick comes out clean.
(The second baked cake is done in my 11x17 baking sheet)
Cool on wire rack.
For Ice Cream Sandwiches: you can use Giada's Hazelnut Gelato or ice cream of choice.
(Giada's Hazelnut Gelato )
Cut cake in half. Spread softened ice cream on top of the cake. Make sure you have close to 1 inch thick of the ice cream.
Place second half of cake on top of the ice cream. Be careful, as the cake is quite soft and can break on you. You can always patch it...the ice cream will hold it in place. I like to use the parchment paper to help me lift it on top, and then peel the parchment paper. Cover with plastic wrap and refrigerate until ice cream is hardened. Cut into rectangular shapes...
Wrap each ice cream sandwich in plastic wrap and freeze for a later day. Or eat one then, as a snack:). You can also serve it as a dessert and embellish it with some chocolate sauce chopped nuts, whipped cream and a cherry on top.

Friday, May 15, 2009

Profiteroles Filled with Vanilla Ice Cream


Profiteroles Filled with Vanilla Ice Cream .... Profiteroles are a basic pate a choux dough filled with ice cream . But, they look so classy! The pate a choux can also be used for cream puffs, eclairs, and other type of pastries. It can become an elegant dessert in no time, especially if you make the puffs in advance. It is true, you can make the puffs in advance and freeze them! Take them out to defrost and fill them with your favorite filling. You can crisp them up again in the oven(300deg) for a 5-8 minutes, if you like. My favorite filling is ice cream, though you can fill them with whipped cream, pudding, or custards. Yes, you can also fill them with savory fillings such as chicken salad, egg salad, crab meat, shrimp filling, and whatever you may fancy. Try them with some soft herb goat cheese. They are great finger sandwiches for tea parties as well. You can also mix in some shredded cheese into the dough and they instantly become gougeres. Pretty nice...a versatile dough for all kinds of recipes! For this recipe, I chose to use a vanilla bean ice cream drizzled with a chocolate sauce. I don't think you can go wrong with that combination.

You will need: Adapted from America's Test Kitchen Baking Book
2 large egg
1 large egg white
5 tablespoons unsalted butter, cut into 10 pieces
2 tablespoons whole milk
6 tablespoons water
1 1/2 teaspoons sugar
1/4 teaspoon salt
1/2 cup unbleached all-purpose flour, sifted

To make the profiteroles: Preheat oven to 425 F. Spray a baking sheet with nonstick cooking spray and line with parchment paper or use a silpat if you have one. They are great... nothing sticks to them.
Beat the eggs and egg white in a measuring cup. In a small saucepan over medium heat, bring the butter, milk, water, sugar and salt to a boil.
Stir until the mixture melts. Immediately remove the saucepan from the heat when the mixture reaches a full boil. With a wooden spoon, stir in the flour until combined keep stirring until the mixture clears the side of the pot.
Return the saucepan to low heat and cook, stirring constantly.Use a smearing motion, until the mixture is slightly shiny about 3 minutes.
Transfer the mixture to a food processor and process for about 10 seconds to cool the mixture slightly. Gradually add the eggs in a steady stream while the machine is still running.
Stop the machine and scrape down the sides of the bowl, then process for another 30 seconds until a smooth, thick, sticky paste forms.
Transfer the paste to a pastry bag fitted with a 1/2-inch plain tip. You can also use a sturdy plastic freezer bag. Just cut a 1/2 inch piece off one corner. Pipe the paste into 1 1/4 - 1 1/2-inch mounds on the prepared baking sheet, spacing them about 1 inch apart. You should be able to pipe about 24 mounds on the baking sheet.
Smooth out the surface of the piped dough with a wet finger or with the back of a teaspoon dipped in cold water.

Bake 15 minutes (do not open the door at all during this time), then reduce the oven temperature to 375 F and continue to bake until golden brown and fairly firm, 8 to 10 minutes longer.
My baking time was a little less( I made mine a bit smaller). Just keep an eye on them( through the oven door) so they won't get burned.Remove the baking sheet from the oven and with a paring knife, cut a 3/4-inch slit into the side of each puff to release steam.
Return the puffs to the oven, turn off the oven and prop open the door. Dry the puffs in the oven until the centers are just moist and the puffs are crispy, about 45 minutes( I didn't leave them that long since I noticed that they were nice and crispy and dry inside). Transfer the puffs to a wire rack to cool. Fill them with your favorite filling or use ice cream like I did.
(Note: The puffs can be stored at room temperature for one day or frozen for up to 1 month. Re-crisp them in the oven. This is great if you have any unexpected guests.)
For the filling:
Ice cream, enough scoops for each puff
Freeze a parchment lined tray until chilled. Use a 2 inch ice cream scoop, or use a round TBS measurement(the stainless steel kind) to form ice cream balls. They should be about the same diameter as the puffs. Place them on the chilled parchment lined tray. As you can see, I didn't se the parchment paper,... they stick if you don't. So, I would recommend the parchment paper.
Cover the ice cream with plastic wrap and freeze. You can do this ahead for dinner guests and assemble them before serving for a quick dessert.
Split the pastries and place a scoop of ice cream on the bottom. Put the tops on.
Drizzle some chocolate sauce or caramel sauce if you prefer.
Chocolate Sauce: this is approximate, I usually just eye it... to make a not too runny sauce. I add just enough liquid to the amount of chocolate... depending how many puffs I make.
1/2 cup cream* , heated to almost boiling
1/2 cup chopped chocolate, or chips
*I didn't have any cream so I used 2% milk ...it worked just fine. Alternately, you can use half and half as well.
Add the chocolate to the heated cream/half and half/milk. Let sit for a few minutes. Stir to combine. If it is too runny, melt some more chocolate and mix it in. Drizzle over the profiteroles.
Here is another full fat version:)...in case you would like to try this.
Chocolate Sauce:
1 cup cream
1/4 cup light corn syrup
4 TBS unsalted butter,cut up
8 oz bittersweet chocolate, chopped
pinch of salt
Heat cream, corn syrup, butter and salt to a boil. Take off heat and add chocolate. Cover and let it sit for about 5 minutes. Uncover and stir gently until smooth.