~ "By wisdom a house is built, and through understanding it is established; Through knowledge its rooms are filled with rare and beautiful treasures." ~ "Reckless words pierce like a sword, but the tongue of the wise brings healing" ~ "But the wisdom that is from above is first pure, then peaceable, gentle, and easy to be intreated, full of mercy and good fruits, without partiality, and without hypocrisy." ~ "Trust in the LORD with all your heart, and lean not on your own understanding; in all your ways acknowledge Him, and He shall direct your paths."~

Monday, December 15, 2008

Sweet and Sour Chicken


Sweet and Sour Chicken....Since my husband and I love Chinese food, I have often tried to duplicate some dishes at home. Sweet and sour chicken or orange chicken is always a favorite except that you have to keep an eye on the calorie intake. So, every so often when we crave it, I make this BIG batch that I freeze. Since the chicken is deep fried, I have opted to use just a few pieces, add more vegetables and still satisfy the craving.

I love making this recipe as I can freeze it in smaller batches and take it out at a later date. I also love the way it crisps up in the toaster oven before I add the vegetables and sauce. You can vary the sauces to your liking....add orange peel to the sauce to make it orange chicken, ginger, pineapple, garlic, etc . I sometimes opt to use a duck sauce that has pineapple juice in it( store bought) when I don't have the time to make it. But, really there are many good sweet and sour sauce recipes on the net.....You can click Here,Here, Here or Here for some ideas.
In this recipe, I used a simple store bought duck sauce. But, you can make this sauce as well if you plan on making this for a larger group. Hope you enjoy...

NOTE: To really get the chicken extra-crispy, place fried chicken pieces in a 450 deg F oven/toaster oven and bake until outside crust crisps up to your liking... you may need to turn the chicken pieces over once during the baking process. 

Orange sauce:
1/2 cup white vinegar (or rice)
8 oz pineapple can (syrup only)
1/4 cup cornstarch
3/4 cup sugar
1 3/4 cup water
orange peel (1-2 TBS)
Combine 1/4 cup water with 1/4 cup cornstarch set aside. In saucepan, combine 1 1/2 cup water, sugar vinegar, pineapple syrup and orange peel. Heat to boil. Add cornstarch mixture until it thickens.

For the chicken you will need:
8 chicken breasts
2 1/4 cup flour
1/2 tsp salt
1 tsp pepper (or more)
1/2 tsp salt
1 1/2 tsp baking powder
2 TBS oil
2 TBS cornstarch
1 egg
2 cups water
2 tsp onion powder (optional)
oil for frying

Directions:
1. Cut up chicken in bite size pieces.
2. Season with pepper, 1/2(or so) tsp salt and 1 tsp onion powder.
3. In a large bowl, combine flour, 1/2 tsp salt, 1/2 tsp pepper, 1 tsp onion powder, baking powder, and cornstarch.
4. Mix oil, egg and water.
5. Incorporate the dry with the wet ingredients to make like a pancake batter.
6. Pour batter over cup up chicken and mix to coat all pieces.
7. Heat oil to about 350. Using a fork, pick up chicken piece and scrape the batter off using the edge of the bowl.
8. Place in hot oil and deep fry until golden.
9. Drain on paper towels. At this point, if you feel the chicken coating isn't as crispy as you like, you may opt to bake it in the oven for a few minutes until the outside crisps up... see NOTE above.
10. You can use the chicken then or let cool and place in small bags and freezer.
11. Defrost and bake in the toaster oven/oven at 45o deg F... till nice and crispy.

Sweet and sour Chicken with vegetables and sauce:
1 bell pepper, diced, any color or a mix
1/2 onion , diced
2-3 garlic cloves sliced or minced
2-3 bunches green onion , cut up in 2 inch pieces
1-2 tsp sesame seeds
2 tsp olive oil
1/3-1/2 cup duck sauce
8- 10 chicken pieces

Directions:
1. In a large skillet, heat oil till hot.
2. Add peppers and onion.
3. Stir fry for 1-2 minutes...not too long, you still want them to be crisp.
4. Add garlic and stir fry for 30 seconds.
5. Add about 1/2 cup sauce(or more depending how much chicken you add).
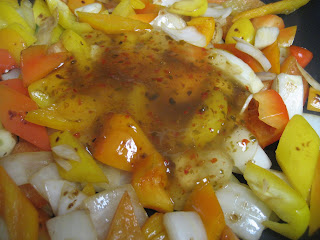
6. Cook till hot about 30 seconds or so.
7. Add chicken and mix to coat with sauce.
8. Add green onion.
9. Take off heat. Sprinkle with sesame seeds.
Enjoy!

Friday, December 12, 2008

Oven Roasted Fingerling Potatoes


Oven Roasted Fingerling Potatoes... a great complement to any dinner menu. Great with fish, chicken, beef, and pork. Or even with sunny side eggs :). Hope you enjoy...

You will need:
10-12 long fingerling potatoes, cut in half lengthwise
salt/pepper to taste
1-1 1/2 tsp paprika
1 -1 1/2 TBS olive oil
2 tsp roughly chopped rosemary

Directions:
1. Toss first 4 ingredients together.
2. Place in a shallow baking pan. Use parchment paper for easy clean-up ... and not stuck potatoes!
3. Sprinkle with rosemary.
4. Bake in toaster oven at 450 degrees for 40-45 minutes.. or until cooked. Turn once halfway during the baking time. Enjoy as a side dish.

Tuesday, December 9, 2008

Chocolate Banana Bread


Chocolate Banana Bread.... I loved this Banana Bread. It was quite moist and delicious. Actually, I made a mistake when I made this bread. But, I really like the mistake that I made and will probably be making it like this from now on:).

The original recipe has you make a variation to the classic Banana Bread. You can add chocolate chunks into the batter and decrease the sugar amount. Well, when I read through the variation I got excited with the idea(or my mistaken idea)...I must have read wrong as I assumed it said cocoa. SO, I thought how neat!...a chocolate banana bread! What a great idea! Well, I continued with that "idea" and added the amount it called for in chocolate chunks with cocoa instead. I also decreased the amount of sugar. The result was awesome...I really liked it! But, you can try the original recipe and do the variation as it calls for using chocolate chunks. Or, you can do mine and see if you like it as well(and you don't have to decrease the amount of sugar if you don't want to). Hope you enjoy...

Note:~I usually freeze my breads...I noticed that they are more moist using this method, and the flavors more pronounced...the only problem is you have to wait:).

My Variation: Reduce the sugar to 10 TBS and add a heaping 1/2 cup grated bittersweet chocolate to the flour mixture. OR to make my mistake add 1/2 cup of cocoa to the flour mixture and reduce the sugar to 10 TBS!

You will need: the original banana bread recipe. ~adapted from America's Kitchen Family Baking Book

2 cups all purpose flour
3/4 cup sugar
3/4 tsp baking soda
1/2 tsp salt
3 large very ripe bananas, mashed well (1 1/2 cups)
6 TBS (3/4 stick) unsalted butter, melted and cooled
2 large eggs
1/4 cup whole or low-fat plain yogurt (I used sour cream)
1 tsp vanilla extract (you can add rum,orange or any other flavoring you want)
1/2 cup walnuts, toasted, chopped or macadamia and toasted coconut(1 cup)

Directions:
1. Adjust an oven rack to lower -middle position and heat the oven to 350 degrees F.
2. Grease an 8 1/2 by 4 1/2 inch loaf pan.( I always add a piece of parchment on the bottom to ensure total release)
3. Whisk the flour, sugar, baking soda and salt together in a large bowl.
4. In a medium bowl, whisk the mashed bananas, melted butter, eggs, yogurt and vanilla together.
5. Gently fold the banana mixture into the flour mixture with a rubber spatula until just combined(do not over mix).
6. Fold in the walnuts(if using) the batter will look thick and chunky.
7. Scrape the batter into the greased pan and smooth the top.
8. Bake until golden brown and a toothpick inserted into the center comes out with just a few crumbs attached, about 55 minutes, rotating the pan halfway through the baking.
9. Let the loaf cool in the pan 10 minutes then turn out onto a wire rack and let cool for 1 hour before serving.

Christmas Ornaments


Christmas Ornaments.....Came upon this cute idea from Kraft Foods recently. I decided to try it and see if I could duplicate it...I got to admit it looked cute. A nice addition to any Christmas gathering. So, I am posting this in case you care to try it. Hope you enjoy...

You will need:
24 Ritz crackers
1/2 cup cream cheese
green onion
tomato( I used red bell pepper instead)

Directions:

1. Using about 1-2 tsp of cream cheese per cracker ,spread cream cheese in a circle sort of mounding it.
2. Decorate to resemble an ornament with green onion and tomato (or red bell pepper).

Monday, December 8, 2008

Molten Lava Cakes


Molten Lava Cakes(Individual Fallen Cakes)... I've always wanted to try making Molten Lava Cakes. It is a recipe that has good reviews from people making it for a special dinner(or not). Actually, I wanted to try it because it is a make ahead dessert. I love making make-ahead recipes that make my life easier!You can bake these individual cakes while you have dinner and it will be ready to eat in no time. All you have to do is dress it up a bit with some raspberry sauce and fresh raspberries and/or enjoy it with a scoop of ice cream, or whipped cream. A great finish to a great dinner!
~This recipe is made for 6 ounce ramekins...8 to be exact. I didn't have any... so I used a mini loaf pan. It seemed ok to me and so I used it and it came out great!...except that you have a rectangular shaped cake instead of a round shape. But, then you make it your own!:) Hope you enjoy...

Note: These restaurant-style cakes are slightly under baked, so that their centers remain a little saucy... but if you overbake them, they will still taste great:)

Tip: After portioning the batter into the ramekins, wrap the ramekins tightly in a plastic wrap and refrigerate up to 8 hrs or freeze for up to 1 month . I chose to freeze mine. Unwrap and bake the frozen ramekins(do not thaw) in a baking sheet as directed, increasing the time to 12-15 minutes.

You will need:~adapted from America's Test Kitchen Family Baking Book

8 TBS (1 stick) unsalted butter,cut into 8 pieces
8 oz semisweet or bittersweet chocolate, chopped (I used chips)
1 tsp vanilla extract(or raspberry extract, orange peel, Irish cream or etc)
4 large eggs
1 large egg yolk
1/2 cup sugar
1/4 tsp salt( I usually use a pinch)
2 TBS flour
Cocoa powder; for dusting ramekins
confectioners' sugar for dusting
caramel sauce/raspberry sauce for decorating
fresh raspberries for garnish

Directions:
1. Adjust an oven rack to the middle position and heat oven to 400 deg F.
2. Grease eight 6 oz ramekins, dust with cocoa powder.( I always take a precautionary step and add a piece of parchment paper to ensure that they will come out). Set on a large rimmed baking sheet.

3. Melt butter and chocolate together in the microwave( I used the stove top). ...stirring often 1-3 minutes.
4. Transfer the mixture to a large bowl and let cool slightly.
5. Stir in the vanilla or any other flavoring you like). In a separate large bowl, whip eggs and egg yolk together with an electric mixer on med-low speed until foamy, about 1 minute.
6. Increase the mixer speed to medium and gradually whip in the sugar and salt, about 30 seconds.
7. Increase the mixer speed to high and continue to whip the eggs until very thick and pale yellow 5-10 minutes.( I beat it for 7 min).
8. Scrape the whipped egg mixture on top of the cooled chocolate mixture, then sift the flour over the top.
9. Very gently fold the mixture together with a large rubber spatula until just incorporated and no streaks remain.


10. Spoon the batter evenly into the prepared ramekins.
11. Bake the cakes on the rimmed baking sheet until they have puffed about 1/2 inch above the rims of the ramekins and jiggle slightly in the center. 10 -13 minutes.
12. Run a small knife around the edges of the cakes.
13. Gently invert each ramekin onto an individual serving plate and let sit until the cakes release themselves from the ramekins, about 1 minute.
14. Remove from the ramekins and dust with confectioners' . Drizzle with caramel sauce and/or raspberry sauce. Garnish with fresh raspberries.

Wednesday, December 3, 2008

Raspberry Sauce/ Bing Cherry Sauce...


Raspberry Sauce/Bing Cherry Sauce... I came up with this recipe on the spur of the moment. I always buy raspberries in the summer and freeze them for things like this. I needed to dress up some molten lava cakes but didn't want to make too much sauce. You can use this sauce on ice cream, cakes, crepes, pancakes and really whatever you may fancy. I think you may be able to add more fruit or cut back a bit on the sugar for a less sweet sauce. Either way, it is a good simple sauce.... more like good raspberry preserves:). You can also make a cherry sauce by using frozen cherries. The sauce can be used on top of pancakes and spread on crepes or served over ice cream... so, so much better than store-bought! As a plus, you can control the sugar amount according to preference. Hope you enjoy...

Bing Cherry Sauce

Ingredients:
1.5 lbs frozen bing cherries
2/3 cup sugar, or to taste
1 TBS cornstarch, optional
2 TBS lemon juice
1 tsp vanilla extract

Directions:
In a sauce pan, add cherries, sugar, cornstarch, and stir to combine. Cook over low-med heat until sauce thickens to your liking... about 20-30 minutes. Stir in lemon juice and vanilla. Allow to cool and store in fridge.

Raspberry Sauce

Ingredients:
1 cup frozen raspberries( a bit more if you don't want it that sweet)
1/3 cup sugar
1-2 tsp lemon juice or to taste

Directions:
1. Place raspberries and sugar in a heavy saucepan.

2. Bring to boil stirring constantly.


3. Boil for 5-7 minutes on high stirring constantly so as not to burn. You can see a trail when you scrape the bottom of the pan using your spatula.


4. At this point, turn off heat and add lemon juice and cool. It will thicken as it sits.

Caramel Sauce


Caramel Sauce...I am sure you've all tried making caramel sauce and having the sugar crystalize.No?...Well, I have..... and having to deal with brushing the sides of the pan with a brush so that the sugar crystals will dissolve (not to mention that you can't stir or it will cause your caramel to fail).... really that is not my cup of tea. So, I searched for a "foolproof" caramel sauce. I finally came upon a good one ...one that makes sense to me! This involves you covering the pan so that there will be condensation which in turn "brushes the sugar crystals on the sides of the pan" Really, all it does is to mimic the process that I didn't want to deal with...so, I think this will do for me! For this recipe, I halved the ingredients and forgot to heat the cream and it still came out. So, in my book this is a great recipe. Happy to share it with you! Hope you enjoy...

Ingredients:~adapted from CDKITCHEN.COM~

1 1/2 cup sugar
1/2 cup water
3 tablespoons butter
1 cup heavy (whipping) cream, heated
1/2 teaspoon vanilla extract or 2 TBS Irish cream

Directions:
1. Place the sugar and water in a medium, heavy saucepan.
2. Bring to a simmer over medium heat, swirling occasionally I just swirl the pot and do not use any spatula or wooden spoon.
3. Cover the pan, raise heat to medium-high, and cook for 2 minutes, or until the liquid gives off large, thick bubbles.
You will notice some condensation.
4. Remove the cover and cook, swirling the syrup, until it turns golden brown.
Be careful so as not to over brown or burn. Keep an eye on it ...it shouldn't take too long.
5. Remove the pan from heat and stir in the butter with a wooden spoon.
6. Add the cream, stirring constantly, then add the vanilla or any flavoring you want.
I used Irish cream to make it my own!
7. Return the pan to low heat and stir constantly until any lumps have melted and the syrup is smooth.

Serve warm over ice cream or cake, or pour into a jar, cover and refrigerate for up to 1 week.